Suprise! Maria of
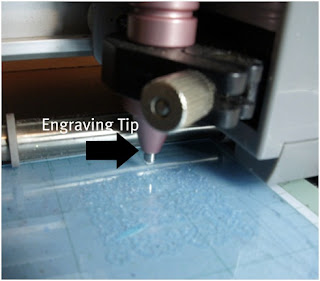
Believe Dream Create is back with another AWESOME idea with the Chomas Creations engraving tip! Scroll down a bit for Maria's directions for an engraved monogram necklace. The Chomas Creations engraving tip is on pre-order for just $25, and will be shipping the end of next week! This price is a pre-order special and will go up when they start shipping!
I'm also have a sale on my blog on all of the Chomas Creations products! There is the "I want it all" sale where you get the Chomas Creations embossing kit, mini gel pen holder with all 20 mini gel pens, mini Sharpie holder, and micro Sharpie holder with a black micro Sharpie all for just $100 shipped in the US, this is a $120 value! For those outside the US it is just $105! Now onto Maria's instructions!
Need a gift for a girl friend? I have one! So, so happy with the way this came out!
I used Grafix Clear Plastic Craft sheets and the Engraving Tip.
It is hard to see the engraving due to the clear plastic. The blue you see is the thin backing, which I did not peel off to help it stay on the mat (a tip from Amy!). The top layer I that I am engraving on, I did peel off. I made the file in my Gypsy my welding the “M” right into the design.
When I was done with the engraving part, I changed back to my blade housing (without unloading the mat) and cut the square around the design that would fit right into my Inkssentials Memory Frames™. The size is 1¼ “ x 1¼”. I did a multi-cut of 6 on the Gypsy with my Blade Depth also at a 6. This cut just about all the way through.

I cut the rest of the way through with a craft knife. This is the finished design after the back covering was removed.
I then rubbed some Enamel Accents into the design with my fingers and quickly wiped away the excess. I also cut a piece of metallic red cardstock for the backing. I did try this originally with both acrylic paint and alcohol ink and I did not get the same results that I got with the Enamel Accents. (Amy here: love these crafty hands!!! I often leave the house with my hands looking like this and wonder what people must think hehe!)
I then turned the piece over and filled in the “M” with a silver paint pen.
Next step—turn back to the front and add some Silver Stickles to the front of the “M”.
I then added some self-adhesive Bling and a ribbon. So fun!
Amy here: Isn't this necklace absolutely amazing! Maria always comes up with these fantastic ideas! Wheeeewh! Again Maria, thanks soooo much for this, it ROCKS!
Like what you see? Leave a comment to let me know!


8 comments:
I want one for the Silhouette SD! :)
Awesome,
Susie
This is beautiful!! Awesome job!
Wow this is so beautiful.
It looks stunning :)
I wish Susie, but the Silhouette doesn't have the power, waaah!
I don't have the POWER Captain. LOL. Star Trek. Remember?
Yup, tried embossing to, but no go!
INCREDIBLY clever!
Post a Comment