Easier shopping is here!

For those that wanted easier shopping, click on the shopping tab above or visit http://www.amychomas.com/

We are now taking credit card payments, or you can still use paypal! Any questions, you can send them to amyc222@yahoo.com

Want to learn how to use your new holders? Look to the right of my blog to see everything in categories!


Showing posts with label tutorials. Show all posts

Friday, December 11, 2020

Christmas tags with the Chomas Creations adjustable pen holder

I love making my own Christmas tags for a fun homemade feel when wrapping (or bagging hehe) my gifts.  I have used these tags in the past and you can find the file for them here... tags
I like to draw the design first which I used a Gelly Roll gel pen in the Chomas Creations adjustable pen holder for the Cameo 4 to draw.  You can also do this with any other Silhouette machine with the Chomas Creations adjustable pen holder for the Silhouette.
In order to draw first I send my image over to draw & turn off all the lines I don't want to draw by highlighting them and choosing no sketch.  Notice because I am drawing I select sketch, and then pen.  Now the "cuts" I need to make will not draw as they have been turned off.  Notice what I am drawing is a brighter thicker lined red, and anything not being sent right now is a thin line.
Next I'm going to select everything and set that to no sketch.  
Now I'm going to select cut, and I'm using the auto blade.  Now the items I want to cut I highlight & click the cut option.  Now the only thing being sent once again is the cut lines as you will notice they are thicker lined red.
And look at that a whole sheet of Christmas tags! 

I added some ribbon and will use double sided adhesive to add these to any present or I can just tie them on the handles of any gift bag I may have!  I think they add a fun personal touch!


Like what you see? Leave a comment to let me know! Thanks Amy Chomas

Wednesday, November 18, 2020

Filling a design for engraving with the Chomas Creations engraving tip in Silhouette Studio

Filling a design is super easy with Silhouette Design Studio and I'm going to show you how.  This will work for Chomas Creations engraving tip as well as for use with the Chomas Creations pen and marker holders.  First choose the design you want to use and duplicate a copy.  I like to duplicate a copy (the grey looking one is my copy) so that I also have an outline of my design and not just the fill.  This file called give thanks is available in the Studio store.  Then go to line effects feature in Studio to fill the first image.  Notice I did change the spacing to put the lines closer together and changed the angle a bit.  
Next click on the transform feature and click on the diagonal arrow.  Choose scale by 300%.  This is going to help keep the lines close together for a better looking engrave.

Now go back to line effects and click on release effects.
Now go back to transform and click on 33%.  Notice it is back to the original size!  

Now you can line up your image along with the duplicate image and make them any size you want.  This will keep the lines close together for a great looking engrave!  


Here is my finished piece of acrylic, but this will work on engraving on metal blanks as well.  This is an LED base I got from Craft Chameleon.

You can find the Chomas Creations engraving tip for the Cameo 4 as well as some engraving blanks... here 
And you can find the Chomas Creations engraving tip for the rest of the Silhouette line as well as some engraving blanks... here


Thursday, October 31, 2019

Bracelet cuff with the Chomas Creations precision tip and Cricut Maker

Rainy day fun here today with the Chomas Creations precision tip in the Cricut Maker!  If you want to see a video using Design Space to make a template to line this up easier it is here... https://youtu.be/0c7yFh1DhDc
Want some great news?  You can also do this with your Cricut Explore. :) Just make sure you put it in the right side in place of the blade.
You can find the Chomas Creations tools here...  Chomas Creations


 Notice how I am adding glue dots to help secure this in place.  If you don't there is a good chance it will slide on the mat.


You can change the settings on your materials in the software.  Make sure you are selecting cut in the software as well as choosing a material that requires the fine point blade.

I did do multiple cuts on this. The easiest way is to copy and paste your text on top of each other.


There is a bracelet bending bar kit by ImpressArt that I used for this.  I got it at Joanns here... https://www.joann.com/impressart-bracelet-bending-bar-kit/15081177.html#q=impressart&start=1 


Like what you see? Leave a comment to let me know! Thanks Amy Chomas

Cricut Design space tutorial for use with the Chomas Creations engraving tools


Here is a video on using Cricut Design Space with the Chomas Creations engraving tool.
You can find the Chomas Creations tools here...  Chomas Creations


Like what you see? Leave a comment to let me know! Thanks Amy

Sunday, April 23, 2017

he won't admit it with the Chomas Creations adjustable pen holder

I found these new Sakura gelly roll pens at Michaels and had to give them a try!  They are gold shadow and wow are they neat!

I did fill this font with the internal offset like I have shown in this post... filling a font with internal offset  I added the gel pen to the Chomas Creations adjustable pen holder and let the Cameo do its thing.  This was a tough one to get a pic of!  It does show up nice in real life, and is different colored on different angles. Very cool pens! 

I also used a Staedtler triplus fineliner to do the journaling with the Chomas Creations adjustable pen holder.  The font I used is a thin font from Lettering Delights called Casual.

My pics weren't that great as they were from my phone, but they were sure cute and I couldn't get a repeat performance from Jack!  lol If you want to know more about the oils I am using for Jack and the rest of my family, feel free to visit my oily blog at... getting oily

Want to try any of the tools you see in the Chomas Creations store?   Use the coupon code 17april to save 10% off your order!  www.amychomas.com
Like what you see? Leave a comment to let me know!
SaveSave

Monday, January 16, 2017

Video using the Chomas Creations adjustable pen holder for the Silhouette/Cameo

Have you seen this video of the Chomas Creations adjustable pen holder in action?

You can also watch the video here

The Santa design and the hohoho are a part of the Silhouette Studio downloads.  The white gel pen is a Sakura Gelly Roll.


Like what you see? Leave a comment to let me know!

Friday, December 30, 2016

Birthday card using the Chomas Creations adjustable pen holder and gel pens

I loved all of the black cardstock I've been using with the chalk look, so I thought I would make a birthday card like that.
I used the cut line settings to change out all of my colors.  I have a tutorial on this here... Sparkle card
I like to do things in a row, say brads, buttons, or even this Viva Décor look.  But lining them up just right is near impossible, and I thought, why not draw some circles that are all spaced out, then the work and guessing is done for me?  So I did!  I used the Target brand up & up gel pens in the Chomas Creations adjustable pen holder to draw on black cardstock.
This was super easy in Studio, I just drew a line where I wanted my circles to be, used the rhinestone feature (1), chose the edge feature (2), chose the size rhinestones I wanted (3), and then spaced them further apart (4).  Voila!  All the guess work done for you!

Then I filled all of the circles in with Viva Décor.  This stuff is awesome! I've had it awhile.  The difference in this is when it dries it is still 3d! 
The font I chose is called Vintage One.  I also made a rectangle around the inside of my card and changed my line style settings to be dashed.  I also added a stylus to my Chomas Creations adjustable pen holder to score the fold in my card.  You can see how I did that here... score tutorial


Like what you see? Leave a comment to let me know!

Monday, November 07, 2016

Birthday card with Chomas Creations adjustable pen holder


One of the coolest things about the Sakura Souffle gel pens is how they look on black cardstock!  And they also look like they have a slightly raised texture. 
I used the Chomas Creations adjustable pen holder with the pink Souffle gel pen to draw the flourish background on this card.  The design as well as the birthday sentiment are from the Silhouette Studio store.

Once again I used the Chomas Creations adjustable pen holder with a stylus to score this card.   You can get the tutorial and file for Studio for the card here... 5x7 card
I added some Viva Decor to make the white raised images on this card as well.
Want to make what you see on this blog?  Use the coupon code november16 to save 10% off your purchase at checkout in the Chomas Creations store.


Like what you see? Leave a comment to let me know!

Wednesday, February 24, 2016

Tutorial filling in fonts with internal offset

I got so many questions on how I filled my design on my last post that I figured I would do a quick tutorial for you!  It is actually quite easy and takes less then a minute!  The designs are all Studio downloads.
Click on the offset feature (1) then click on internal offset (2).  You can adjust the offset up and down to space the lines inside your design (3).
Make sure you highlight the outside of your design each time you do this and keep changing the offset up and down until it looks full.  This is a small design, so I did the internal offset 4 times and it completely filled in my design. 
I then added a Sakura Moonlight Gelly roll gel pen to the Chomas Creations adjustable pen holder, adjusted the thickness to 6 and the speed to 3 and drew my design.  Notice that my design is moved away from the white rollers to prevent smearing.


And here is my finished card!!!  Doesn't it look like chalk on chalkboard!


Like what you see? Leave a comment to let me know!

Friday, January 08, 2016

Chomas Creations engraving tip on aluminum tags!

Great news! I've been asked quite a few times where to find engravable metal to use with the Chomas Creations engraving tip, and here it is! Karen Hamski told me all about  Ohax Industries, Inc.and they have tons of colors and sizes of these metal tags that are made out of aluminum so they are nice and light weight! If you are interested in a 21 piece sample pack for $16.50  check it out here... sample pack.  And the owner says he will work with us crafters if we have special sizes we would like. I asked him about smaller sizes for dog tags and he is getting on it! This was my first try at a tag with these aluminum tags, a tag to go on my son's basketball bag. I did delete my phone number on this, there are no marks on the tag as they all come with a protective cover.  The font I used on this tag is called Campbell.
So who wants to know how I got the engraving on that tag to line up? Well have I got a tutorial for you!
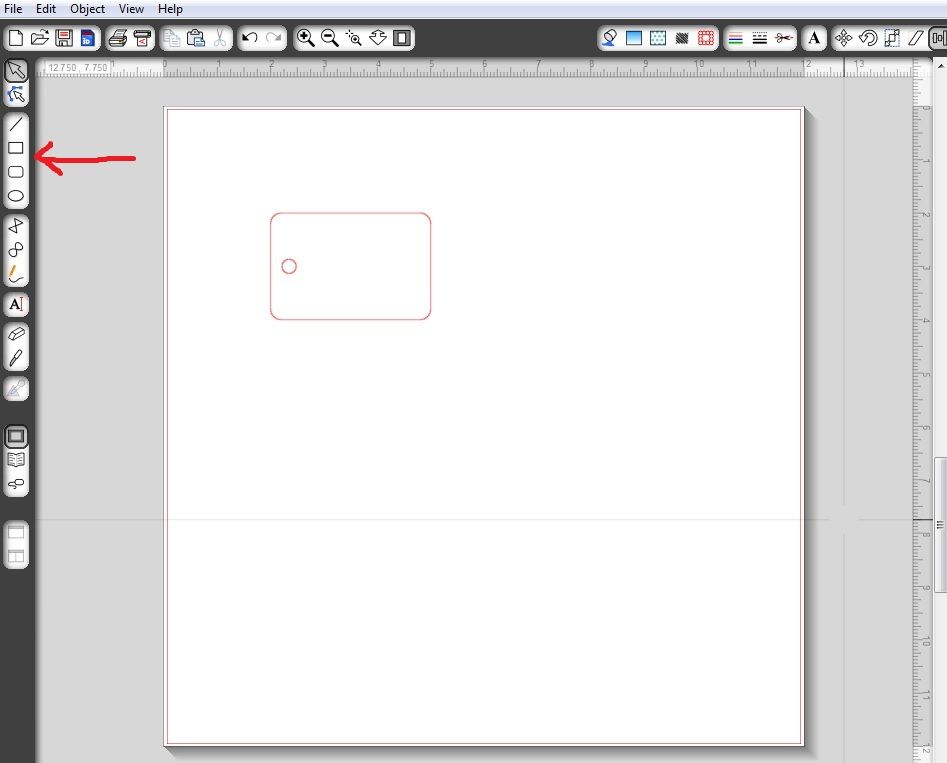
 First create your rectangle, circle, square or another easy shape to recreate in Studio.  In a few days I will have a tutorial for what to do when you really want to engrave on an object that is an odd shape.
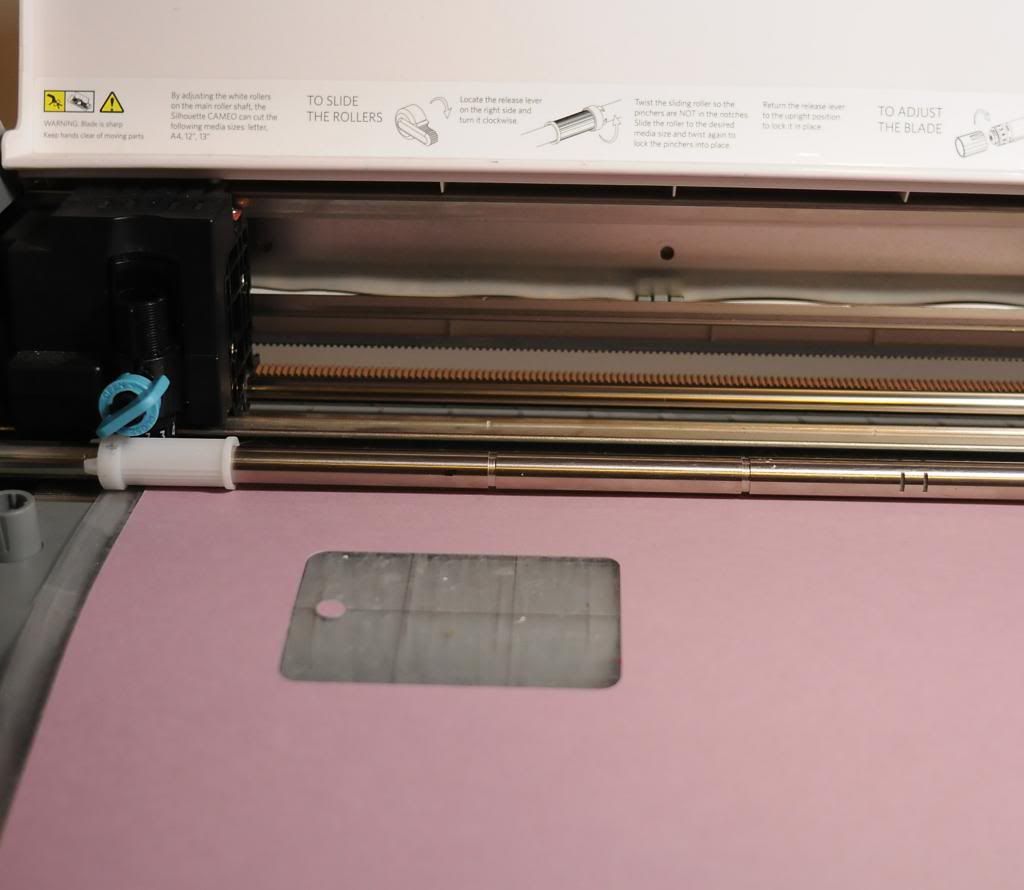
The tag I am using is 2x3 inches.  Put that on your virtual mat.  **Notice how I am not putting the tag too close to where the rollers are going to be, I have it moved over 2 inches.  You may even need to center your tag to get the best engraving possible.  This just worked for me.  If it ends up close to or under the rollers, it will not work.

I use glue dots on the back of my tag to hold it in place on my mat.  **You can try a test cut or draw  the rectangle shape before you add your tag to the mat if you are nervous (this is optional, you can just add the tag to your mat lined up with your virtual mat, but this may save some frustration in the end, and it is pretty quick!)

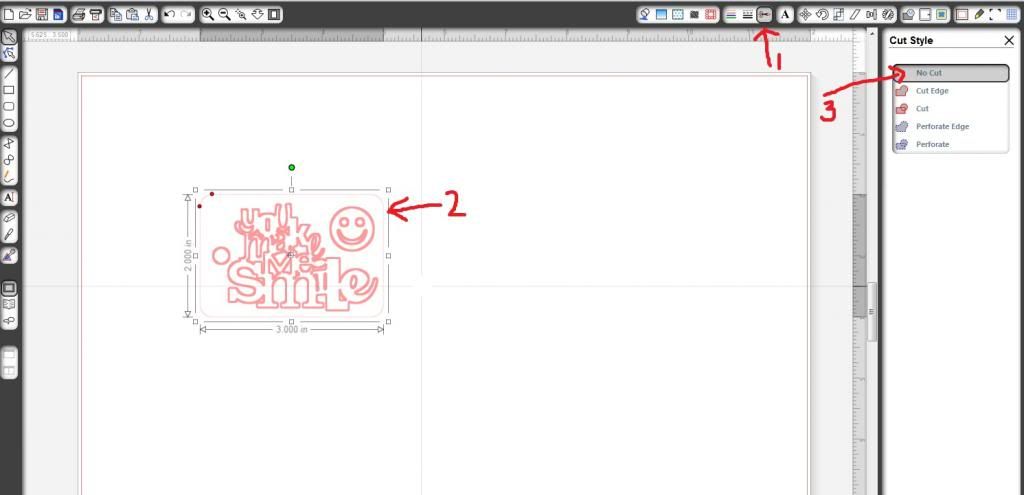
Now I want to turn off the cut lines for when I am engraving. To do this first click on the image of the scissors (1), then click on your image, in this case the tag & small circle (2), and then click on no cut (3).  You can see the design I am going to be engraving on this image.


You can add any text or designs you would like to the Silhouette Studio file.
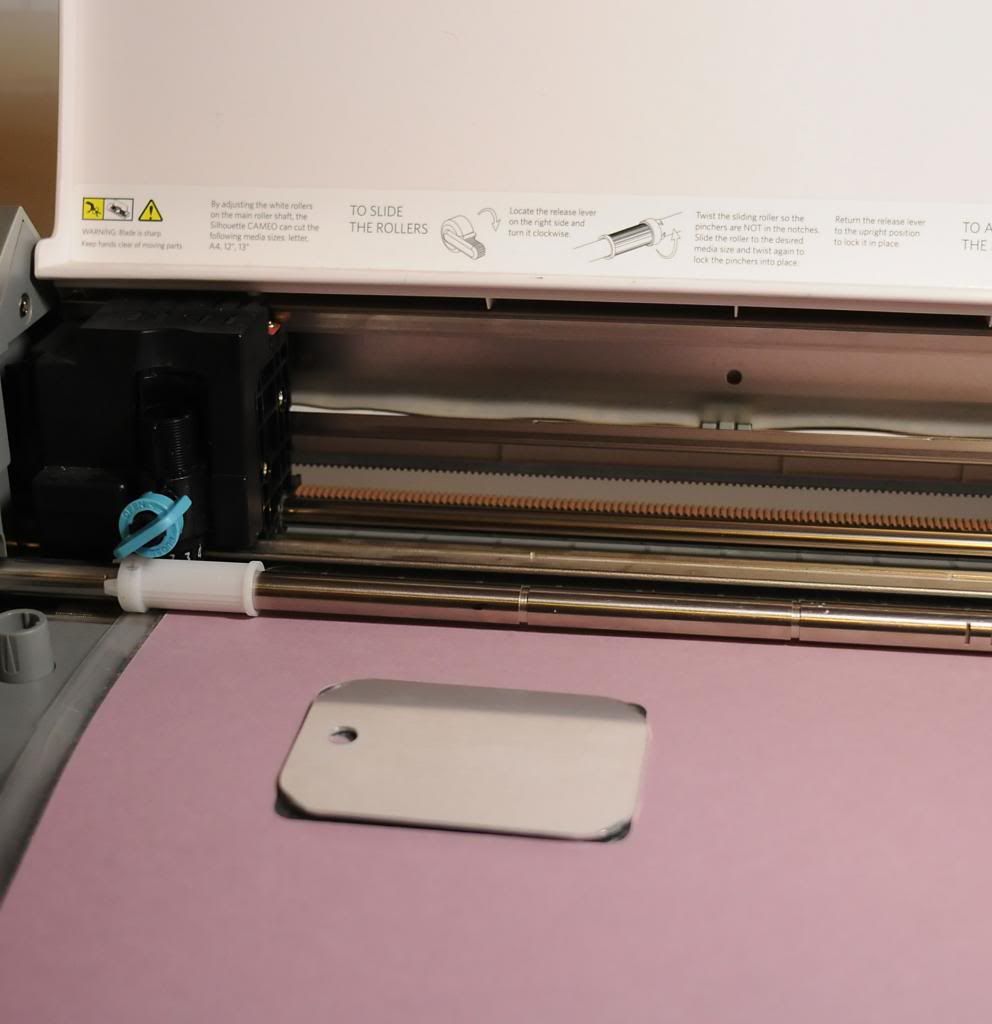
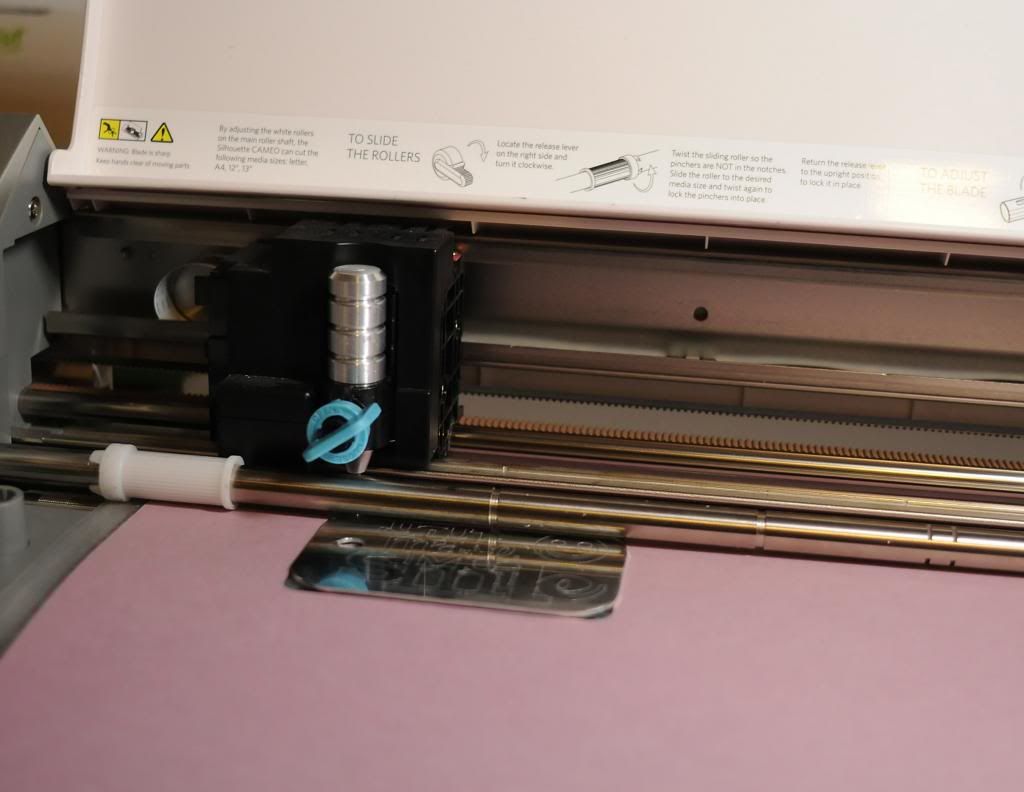
Now add the Chomas Creations engraving tip to the Cameo.  I used a thickness of 33, a speed of 4, and checked double cut and let the machine do its work!
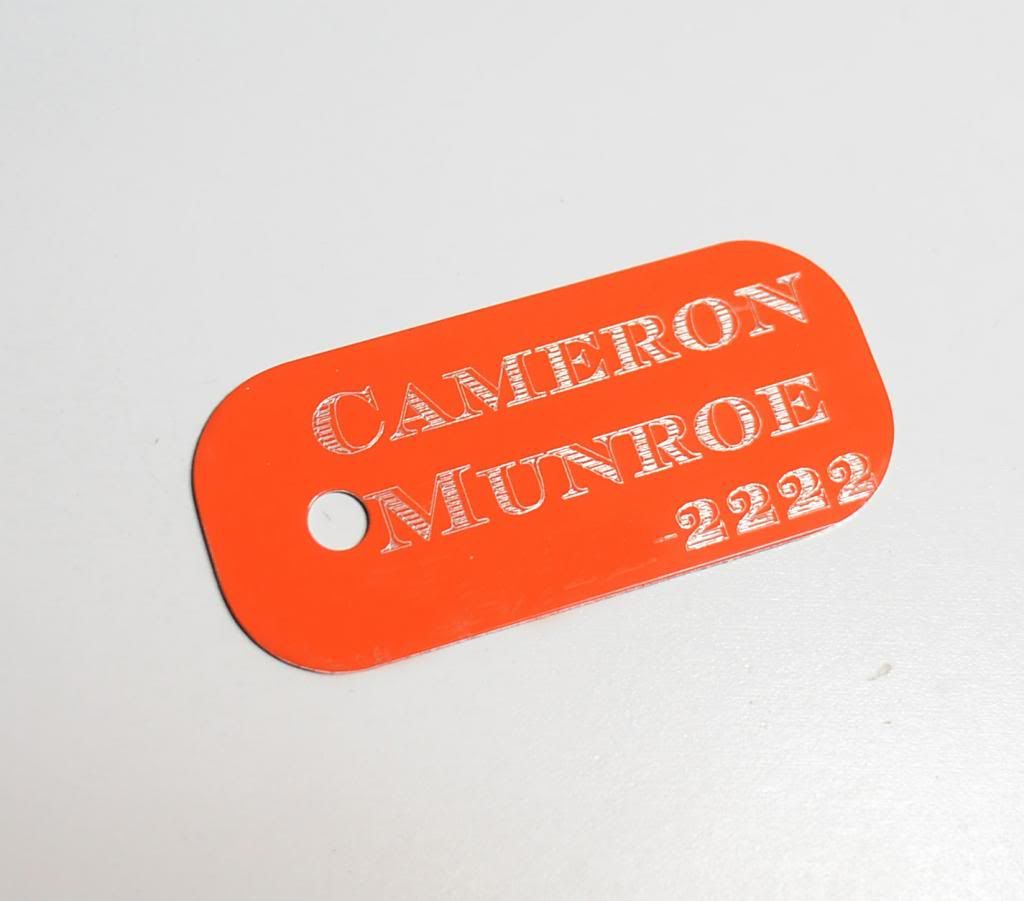
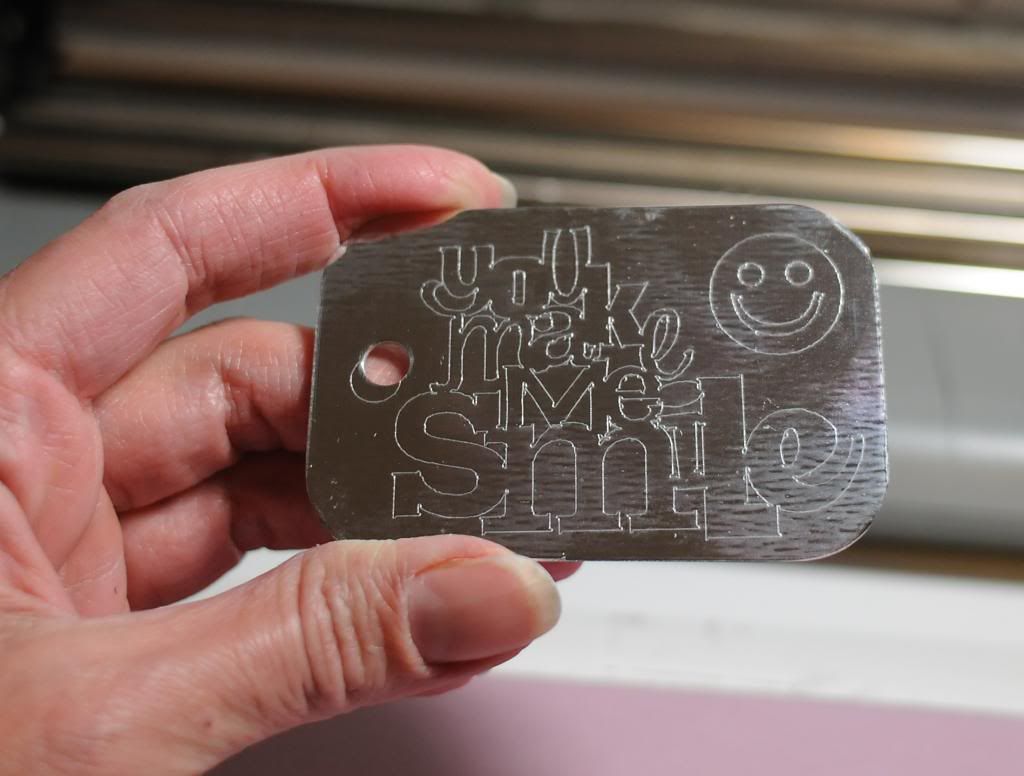
And here is the tag completed.  This is the silver super mirror.

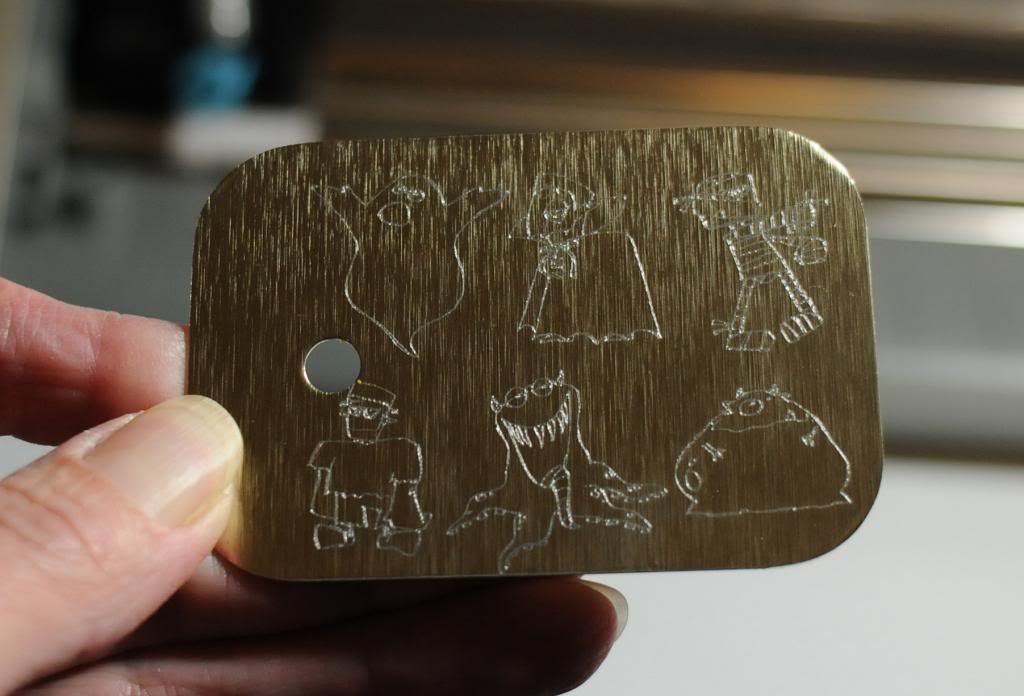
Now when my youngest son saw this tag, he had to have his own. Here is Jack's tag. This font is 101!Block letterz.  You can find a bunch of amazing fill fonts on Kay's blog Creative Someday here...
Fonts 1
Fonts 2

Here is another tag I did on the bright brushed gold.
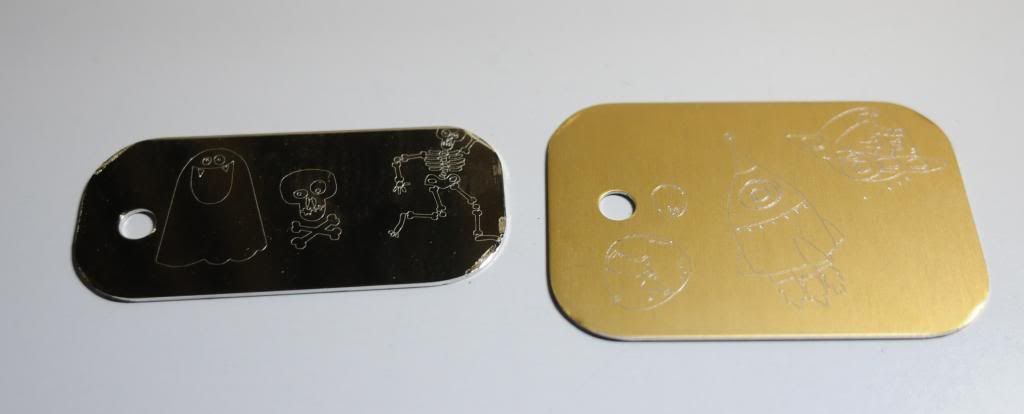
And 2 more tags on super mirror gold (left) and gold anodized (right).
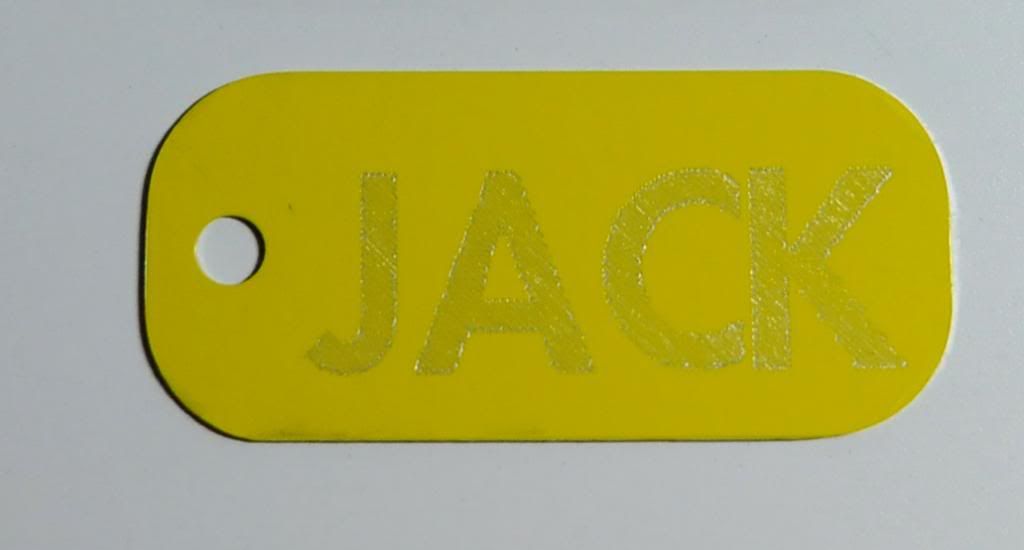
And another one as Jack keeps on asking for them!  He took them all to bed with him the first night hehe!  This font is No Parking.


Like what you see? Leave a comment to let me know!