Easier shopping is here!

For those that wanted easier shopping, click on the shopping tab above or visit http://www.amychomas.com/

We are now taking credit card payments, or you can still use paypal! Any questions, you can send them to amyc222@yahoo.com

Want to learn how to use your new holders? Look to the right of my blog to see everything in categories!


Showing posts with label Design Studio. Show all posts

Monday, August 05, 2013

Back to school with Chomas Creations mini Sharpie holder

It is that time of year again!  Time for my favorite commercial... It's the most wonderful time of the year, they're going back... back to school!  Where the dad is dancing down the aisles... hehe  They should really use a mom in that commercial! 

Being I have 4 kids that go to school each year, I get a bit behind on these back to school layouts!  So this is from last year, my daughter on her way to kindergarten.  You can get the Design Studio file for this page here... back to school
I used the Chomas Creations mini Sharpie holder to do the border and accents on this page on cork board.  Yes corkboard!!  There are so many surfaces out there that the mini Sharpies will write on that normal markers just can't handle!  This corkboard is by Quickutz.  They are 4x12 self adhesive sheets.
I used the Chomas Creations mini gel pen holder to make my own lined paper!  I used the file here for the horizontal lines, that I usually use for my journaling circles....  journaling circles  I drew all the lines in the Chomas Creations light blue glitter mini gel pen.
The back to school file has the vertical lines, I used the Chomas Creations red glitter mini gel pen for these.
This also made for some easy journaling on the page!
I designed the title with a shadow and cut it out of red and green paper.  The title is also on the back to school download.
Here is the completed layout!  The ribbon is Imaginesce.  And of course the patterned paper was made by me hehe!


Like what you see? Leave a comment to let me know!

Thursday, February 16, 2012

Welcome little one with Chomas Creations embossing kit

Lucky me, just over 2 weeks ago I got a new nephew!  This is Drew!  Of course I can't resist a cute boy layout, or cute baby Drew!  I actually used this welcome little one file before to make a page for my boy, and I was looking through old files and wanted to use it again!  You can get the file and see the other page here... welcome little one
I used the Chomas Creations embossing/scoring kit to emboss the little circles on the vellum as my background.  I did use a multi-cut of 2 to get them to really stand out. 

I used the Chomas Creations mini gel pen holder with a glitter silver mini gel pen to draw the title, then without removing my mat from the Cricut machine, I took out the mini gel pen holder, replaced the blade, and cut the shadow around the shapes.

I also used the Chomas Creations  mini gel pen holder to draw the journaling circles.  You can get a tutorial and the download for the design here... journaling circles

I added my super cute pictures of Drew, some ribbon and buttons to the page to finish it.

And did I mention that you can get the Chomas Creations mini gel pen holder and embossing kit at lower prices in the Chomas Creations store
And that I now have a way to sign up to email alerts to you when ever I post something new on this blog?  It is on the right----->
Like what you see? Leave a comment to let me know!

Tuesday, January 24, 2012

It's a boy card using Chomas Creations embossing kit

It's a boy card (hopefully, every once in awhile they are wrong!) for my new nephew that will be coming on Thursday!  I'm very excited for his arrival! 
If you would like to make this card with Design Studio, Doodlecharms and Boys Will be Boys cartridges, you can download the file here... it's a baby card  And if you need it for a girl, that is included in the file as well!
I used the Chomas Creations embossing kit to make the bottle border on the bottom of this card.  By adding the metal sheet colored side down, then embossing, you can sand the raised image to get this look.

I also used the Chomas Creations embossing tip (this time without the mat) to score the fold in my card.  I have a tutorial on that here... score card tutorial


Like what you see? Leave a comment to let me know!

Wednesday, January 11, 2012

Celebrate birthday card with Chomas Creations engraving tip

There are lots of birthdays coming up in January, so I will have to make a lot of cards!  I doubled up on this design, so this is a 2 for 1!  You can download the Design Studio file for this card using George and Birthday Bash here... celebrate card
Don't forget to use the coupon code january10 to save 10% off your entire order in the Chomas Creations store.
I used the Chomas Creations engraving tip to etch the cupcake design into Core'dinations cardstock.  I use a multi-cut of 2 for this to really dig into that paper!  This is the engrave page in the DS file, then I replaced the blade in place of the engraving tip to cut the cut around the cupcakes using the engrave cut page in the DS file.

I also used the Chomas Creations engraving tip to score the card.  I set my pressure to high, and then scrored the emboss page of the DS file.  I then replaced the blade in place of the engraving tool and cut the card shape with the card cut page of the DS file.

Next I cut the celebrate page of the DS file and added them to my cards, and added Stickles over all of the sprinkles on the cupcakes.


Like what you see? Leave a comment to let me know!

Tuesday, October 25, 2011

Beary cute layout with Chomas Creations mini gel pen holder


My daughter had her eyes on this bear for a long time, but being it is HUGE, I refused to get it for her, thinking of how many stuffed animals we have in our house.  Well along comes Auntie Kristie, and all bets are off!  She had to get this for her birthday, and now the HUGE bear resides in our house!
Don't forget there is a sale going on in the Chomas Creations store when you enter the coupon code 10fall at checkout!
I used the Chomas Creations mini gel pen holder & pink glitter gel pen to draw all the bears on the background paper with the Cricut & Create A Critter.  You can get the file for this page here... beary cute
Being my title letters are small and would be hard to cut and adhere, I instead drew them with the Chomas Creations mini gel pen holder!
I also used the Chomas Creations mini gel pen holder to draw the journaling lines to write my journaling on.  You can see how to do this here... journaling tutorial

Here is my completed page, along with the HUGE bear!


Like what you see? Leave a comment to let me know!

Thursday, October 13, 2011

Cider mill with Chomas Creations embossing kit

One of our favorite family fall traditions is a trip to the cider mill!  Nothing like a cold cider and warm doughnuts!  And then of course you have to walk it off hehe! 
I used the Chomas Creations embossing kit for the Cricut to emboss the border title for this page using From the Kitchen and Lyrical Letters.  You can get the border to use for download here... cider mill
I used the Chomas Creations mini gel pen holder for the journaling circle.  You can the tutorial and download for that here... journaling circles

Here is the 2 page layout using Imaginesce papers.  The little apples were also done with the Chomas Creations embossing kit


Like what you see? Leave a comment to let me know!

Wednesday, October 12, 2011

Birthday cards with the Chomas Creations mini gel pen holder

Here are a bunch of cards I  made with the Chomas Creations mini gel pen holder.  By adding a bunch of different tags to draw out, then adding another layer to cut them, I made a ton of tags in no time, with very minimal work!

You can get the file for this design to use with Lyrical Letters here... birthday page
I start with the page to draw and add the Chomas Creations mini gel pen holder to the Cricut machine and draw the birthday sentiments.
Then without removing the mat from the machine, I carefully remove the Chomas Creations mini gel pen holder and add the blade and cut the next page.  Notice the square around the bracket shapes.  It was easier for me to just leave them, and they don't get in the way.  Sometimes easy is good!
You are left with 12 birthday sentiments to add to cards!  While these were drawing, I was working on adding paper and ribbon to all my cards!  This was quite a quick way to get that many cards done!
I had a bunch of birthday decorations that I added to these cards. 


Like what you see? Leave a comment to let me know!

Tuesday, October 11, 2011

Embossed card set with Chomas Creations embossing kit

I'm trying to get a bunch of cards done for the craft show I'll be doing this weekend!  I would love to have your opinions on how to package these, or if I should sell them seperate?  Let me know what you think!
I used the Chomas Creations embossing kit with Lyrical Letters to emboss all the sentiments on these cards.  You can get the Design Studio file to do a bunch at the same time here... DS file
The papers and chipboard stickers are all Basic Grey.


Like what you see? Leave a comment to let me know!

Saturday, October 08, 2011

Princess frames with Chomas Creations embossing kit

OOoh nothing like some girly pretty princess frames!!!  I used the Chomas Creations embossing kit on Ten Seconds Studios metal sheets to make these designs! 
Perfect for my pink sale in the Chomas Creations store!  Use the code pink10 to save 10% off your purchase at checkout.  And to see the pink cards I did for the Link Up for Pink party click here...  pink post

I used Design Studio with Once Upon A Princess for the designs, which you can download here...  princess crowns  Notice when you download that if you want the words made by single letters (I used the font from Once Upon A Princess to make the word princess) in Design Studio to face the right way, you have to write the word backwards, then click on it and use the flip feature. 
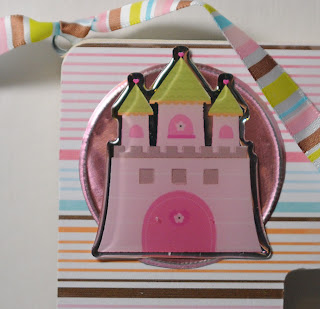
Here is a close up of the princess crown!
I added some circles with an embossed outer edge so you could see the stickers better.
And here are the frames!  The paper, ribbon and stickers are all Imaginesce.


Like what you see? Leave a comment to let me know!

Thursday, October 06, 2011

Boy frame with Chomas Creations embossing kit

A few more boy frames for you to see!  I used the Chomas Creations embossing kit to make the stars for these frames.  You can download the DS file here to use... striped stars


Like what you see? Leave a comment to let me know!

Wednesday, October 05, 2011

Diva frames with Chomas Creations embossing kit


Ok, I had a ton of fun with these frames (minus the burns on my finger tips from the hot glue gun, eeek!  Turning your head to see what your daughter is trying to show you while using hot glue is a BAD idea!)
 My fav things to craft with are bling, glitter, this feather boa, and metal! 
I used the Chomas Creations embossing kit with Make-the-Cut to make the diva titles for these frames. You can download the file here... diva


Like what you see? Leave a comment to let me know!