Easier shopping is here!

For those that wanted easier shopping, click on the shopping tab above or visit http://www.amychomas.com/

We are now taking credit card payments, or you can still use paypal! Any questions, you can send them to amyc222@yahoo.com

Want to learn how to use your new holders? Look to the right of my blog to see everything in categories!


Showing posts with label Silhouette engraving tip. Show all posts

Thursday, January 14, 2021

Etching on acrylic with the Chomas Creations engraving tip in the Silhouette!!!

After the last post I did on my blog (look below :) ) I had to learn how to do the photo etching myself!  I did buy Kay's at Cleversomeday's ebook to get a better idea.  You can find it in Facebook group of Kay's for the Silhouette here... https://www.facebook.com/groups/silhphotoetch/
The group is filled with amazing people that are so helpful and a lot of awesome ideas as well!  You can do this with your Silhouette and Cricut machines with the Chomas Creations engraving tip :)
Here is the picture I started with.
I used a program online called remove.bg to get rid of the background.
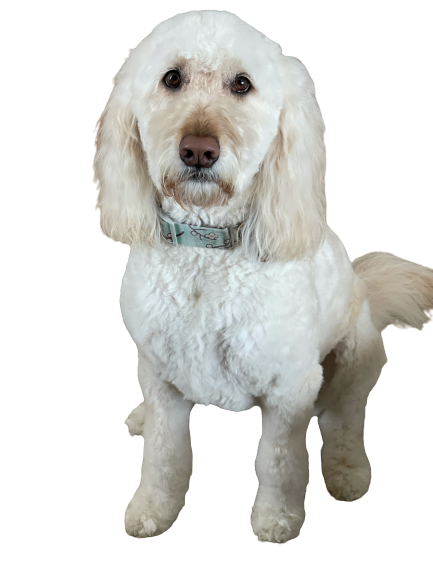
And then I used a sketch program on my iPhone to change the file to a sketch.  You don't need to do this step buy I wanted more contrast because of her light hair.
The rest you have to learn in the ebook! I just wanted to show my starting points.  Her tail was a bit cut off in the pic so I lined that up with the end of my engraved design.
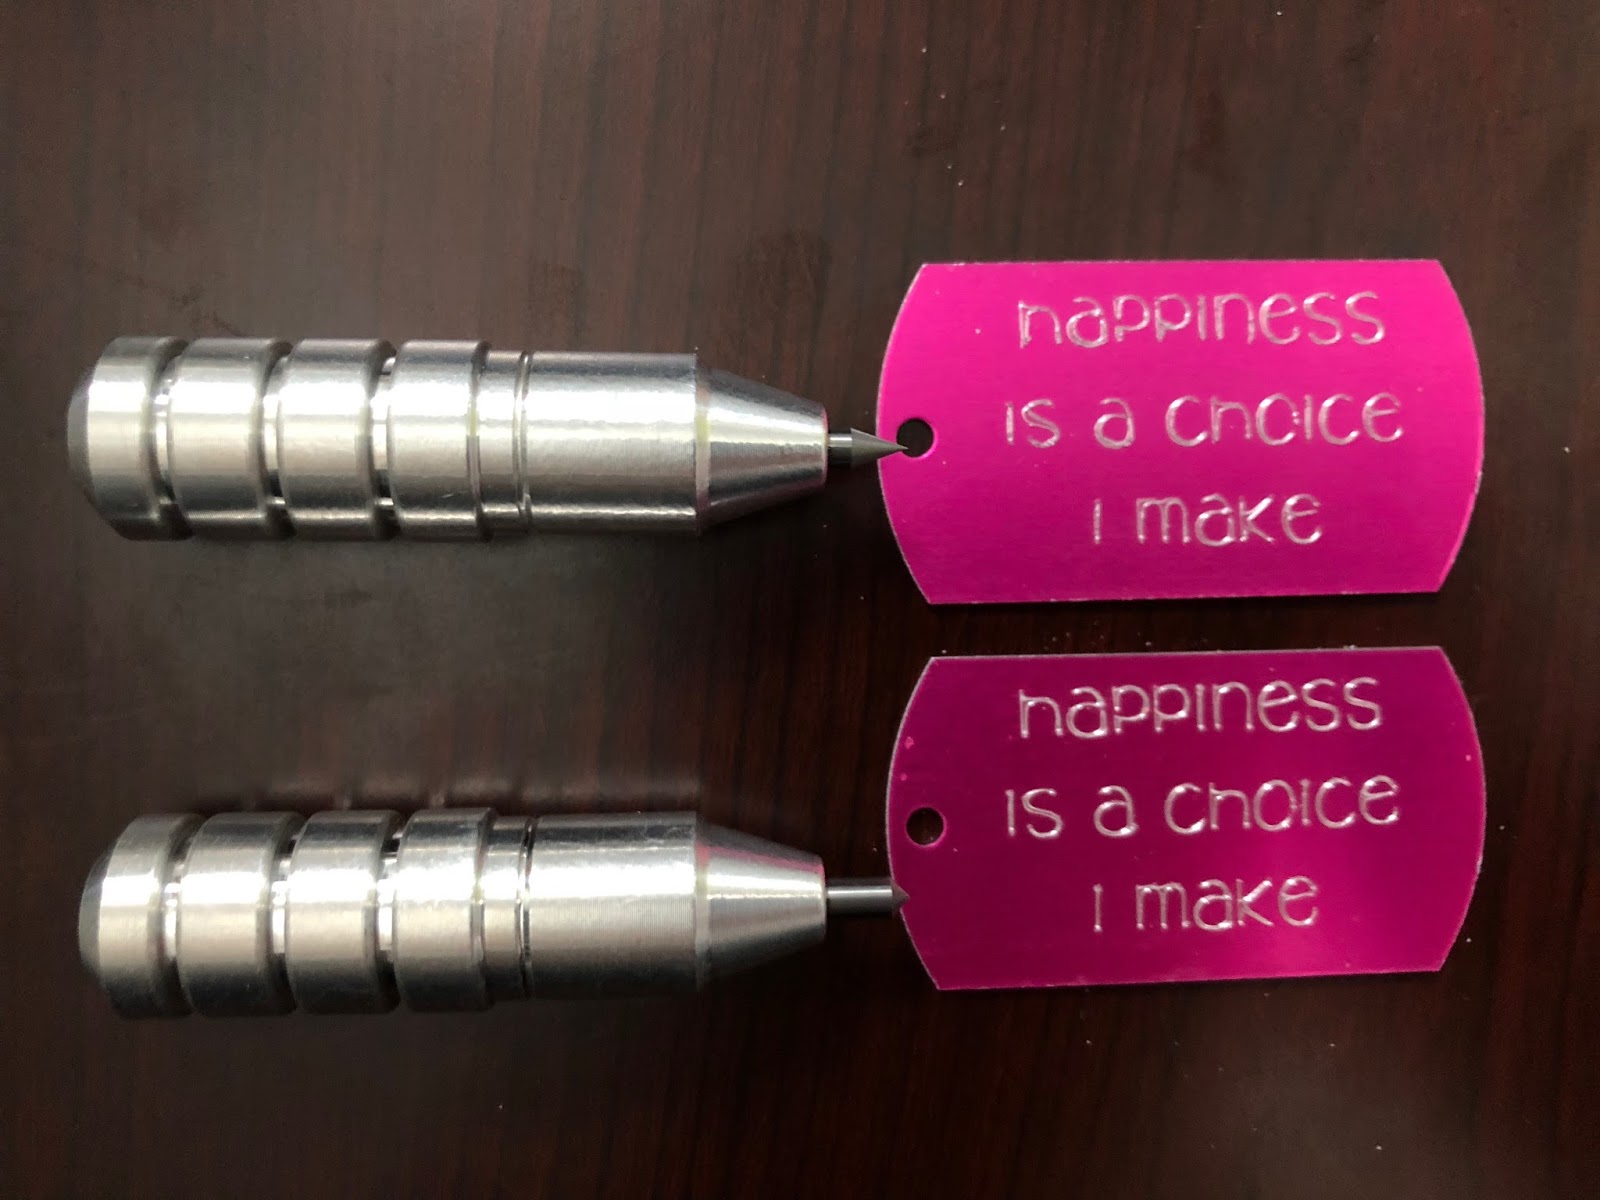
Make sure when you add you acrylic piece to the mat  you use double sided adhesive or painters tape to hold your item in place. It is so important that it doesn't wiggle on the mat!
I did this with the Silhouette as I am waiting for my Explore to arrive and wanted to see how it would turn out. I was impatient and I wasn't let down at all!  I set the software to sketch, pen, and then put the pressure at 30 and the speed at 10.  

Here is my finished design!!!!  EEEEEEK!  
I did try to add a black piece of cardstock behind the acrylic piece here so you could see even more details Let me tell you how HARD it is to take a pic of acrylic LOL!  It is HARD!  You can see it so much better in real life and you can even see the detail in her eyes!


Like what you see? Leave a comment to let me know! Thanks Amy Chomas

Wednesday, December 09, 2020

Chomas Creations engraving tip on a plastic craft mirror

Just finishing switching to my Christmas decorations and needed a cute mirror to put up on one of my cabinets.  I used the Chomas Creations engraving tip on this plastic mirror I got at a local craft store.  
I did fill in the design that I got from Silhouette studio. You can see a tutorial for filling a design here.
I used a speed of 10 and a pressure of 30 with a multicut of 3.  I do like to use the engraving tip when I'm filling a design because it comes to a bit less of a sharp point then the precision tip and fills a design more.
Again I'm going to say how HARD it is to take a pic of a mirror!  LOL!
This will work in the entire line of Silhouette machines!  
You can find the engraver for the Cameo 4 here
You can find the engraver for the rest of the Chomas Creations machines here.


Like what you see? Leave a comment to let me know! Thanks Amy Chomas

Wednesday, November 18, 2020

Filling a design for engraving with the Chomas Creations engraving tip in Silhouette Studio

Filling a design is super easy with Silhouette Design Studio and I'm going to show you how.  This will work for Chomas Creations engraving tip as well as for use with the Chomas Creations pen and marker holders.  First choose the design you want to use and duplicate a copy.  I like to duplicate a copy (the grey looking one is my copy) so that I also have an outline of my design and not just the fill.  This file called give thanks is available in the Studio store.  Then go to line effects feature in Studio to fill the first image.  Notice I did change the spacing to put the lines closer together and changed the angle a bit.  
Next click on the transform feature and click on the diagonal arrow.  Choose scale by 300%.  This is going to help keep the lines close together for a better looking engrave.

Now go back to line effects and click on release effects.
Now go back to transform and click on 33%.  Notice it is back to the original size!  

Now you can line up your image along with the duplicate image and make them any size you want.  This will keep the lines close together for a great looking engrave!  


Here is my finished piece of acrylic, but this will work on engraving on metal blanks as well.  This is an LED base I got from Craft Chameleon.

You can find the Chomas Creations engraving tip for the Cameo 4 as well as some engraving blanks... here 
And you can find the Chomas Creations engraving tip for the rest of the Silhouette line as well as some engraving blanks... here


Monday, May 25, 2020

Aluminum dogs tags with the Chomas Creations engraving tip

What amazing me the most about the Chomas Creations engravers is how very small you can make details and fonts. I used the Chomas Creations engraving tip on these aluminum dog tags with a speed of 5 and a pressure of 33 and a multi cut of 5. If you use double sided adhesive the tags won't wiggle on the mat when you are engraving.
A template is key when you try to engrave on anything. I measure the area I'm going to engrave on and for these I made a rectangle the size of the area where the names went and then cut that rectangle out of a scrap of paper. After that I apply the tag in the area when I am going to do the engraving and it lines up perfect every time. You can find the Chomas Creations engraving tips in my store here www.amychomas.com


Like what you see? Leave a comment to let me know! Thanks Amy Chomas

Monday, May 18, 2020

Cuff bracelets with the Chomas Creations precision tip in the Cameo 4


Playing around today with some copper blanks I got on etsy. They are the cuff bracelets so they are flat when they go into your machine and you bend them when they come out.  
I made sure to use double sided adhesive to stick them to my mat then engraved on them with the Chomas Creations precision tip.  This was in the Cameo 4 but there are also engraving tips for the entire line of Silhouette machines.   The design was from the Silhouette store. After I colored in the engraved design with Sharpie and used rubbing alcohol to get the extra off.  
I used a pressure of 30, speed of 3 and multi cut of 4.  
You can find the Chomas Creations engraving tips in my store www.amychomas.com


Like what you see? Leave a comment to let me know! Thanks Amy Chomas

Tuesday, January 14, 2020

Chomas Creations precision tip in the Silhouette Cameo 3


Another acrylic light this time with the Chomas Creations precision tip in the Silhouette Cameo 3 on a piece of acrylic from Craft Chameleon as well as the light. The Silhouette tools will work in the entire line of Silhouette machines and if you already own them they will work in the Cameo 4 with the blue adapter that came with it.  If you don't yet own the tip for your Cameo 4 just wait as one is being released soon:)

You can find the Chomas Creations precision tip here http://amychomas.com/index.php?main_page=index&cPath=1_2
The light and acrylic are both available at Craft Chameleon.


Like what you see? Leave a comment to let me know! Thanks Amy Chomas

Monday, November 25, 2019

Chomas Creations engraving tip on acrylic coasters

Getting some Christmas gifts made! I used the Chomas Creations engraving tip on these acrylic coasters from Chameleon Crafts! They even come with the rubber feet. Coasters The font is a chalkboard from called KG Second Chances. I put the settings to sketch and pressure to 30 speed to 8 and did a multi cut of 3.
I did the etching in reverse so its on the bottom and you can see it through the other side. So excited how they turned out.


Like what you see? Leave a comment to let me know! Thanks Amy Chomas

Monday, November 11, 2019

Chomas Creations precision tip in the Silhouette


Look at those details!  Those charms are just 1/2 inch in diameter.  Crazy small!  The font is easy to read and I can't wait to add them to some of my diffuser bracelets.
I added the Chomas Creations precision tip to the Silhouette Cameo to do these.  You can find them here... Silhouette tools
The easiest way to line them up is to start by cutting a piece out of cardstock the same size as the material you are going to engrave on.  I cut a 1/2 inch circle and then added my charm to the mat.  It lines up perfect every time.  Here's a video engraving on these tiny charms...


Like what you see? Leave a comment to let me know! Thanks Amy Chomas

Friday, December 15, 2017

Precision tip from Chomas Creations on aluminum blanks

I am being asked the difference between the original Chomas Creations engraver and the new precision tip.  Today I got out some anodized aluminum blanks and put the tools to the test.  The original engraver works just fine on the blanks, but the precision tip does give more detail for very fine images, as you can see here.  These work in all of the Silhouette brand machines.   As you can see the stitching shows up better on the precision tip, which is on the left in the first picture and on the bottom in the 2nd picture.  I used a speed of 1, thickness of 20 and multicut of 4 for both tips.
Both the engraver and precision tip can be found in my store here...  Chomas Creations toolshttp://www.amychomas.com/index.php?main_page=index&cPath=9&zenid=7mocrdl9en7dl5v375ts1bugj6

These blanks are only around 1/2 inch in diameter, so they are very small!
Here are both of the tips with some less detailed images and you can see that they pretty much look the same.  It does seem that the precision tip did etch a bit deeper.
Here is the precision tip in the Silhouette machine.  If you look on any of the images you can see an etched line below the lip on both the engraver and precision tip. I have put this in my machine at this line instead of at the lip to prevent any scratching of the raised surface.  If you have a thicker item to engrave on I highly suggest it.


Like what you see? Leave a comment to let me know! Thanks Amy Chomas

Monday, September 26, 2016

Engraving on aluminum tags with the Chomas Creations engraving tip

I was just WOWED by what Suzanne is doing on aluminum tags with the Chomas Creations engraving tip.  She was using the PixScan mat to hold them in the Cameo.  Notice how she is filling her designs to make them pop out even more!  She used the sketch feature in the Designer's Edition of the software.
You can find Suzanne on facebook here... The Handmade Bouquet
Silhouette School has an amazing to follow tutorial on her page...  engraving tutorial


Like what you see? Leave a comment to let me know!

Friday, May 13, 2016

Engraving leather with the Chomas Creations engraving tip

 Engraving leather?  Wow.  Now keep in mind I did not do these, my talent is in the paper crafting world hehe!  But Cindy Pope was nice enough to let me share her amazing creations where she has engraved with the Chomas Creations engraving tip on leather as well as faux bone.  She has done a class featuring the faux bone in the Curio as well as the Cameo and Portrait. 
In the Curio she uses 6-7 ounce leather and in the Cameo & Portrait she uses 1-4 ounce leather.

Here is a link to the class at craftcast where Cindy teaches you how to do this and even more... craftcast tutorial 


Like what you see? Leave a comment to let me know!