Easier shopping is here!

For those that wanted easier shopping, click on the shopping tab above or visit http://www.amychomas.com/

We are now taking credit card payments, or you can still use paypal! Any questions, you can send them to amyc222@yahoo.com

Want to learn how to use your new holders? Look to the right of my blog to see everything in categories!


Thursday, March 01, 2012

Goofy layout with Chomas Creations engraving tip

Man I feel like I have been slacking lately!   I apologize!  I really miss making layouts to tell you the truth, got to add to that stack that is almost up to the ceiling (ok not really that high, but I have a lot of layouts that need to find homes hehe!)
I found these silly pictures on my computer the other day and couldn't resist a fun page with them!  My sister has a ton of old Halloween costumes that the kids always go through and play dress up with!  The kids all love it! 
I used the Chomas Creations engraving tip for the Silhouette Cameo to etch the background pattern onto Core'dinations cardstock.  The design was a download for Studio called chevron stripes background.  And I have a tip for you!  I used a brillo pad to "sand" the background after it was etched.  It left the dark black color but really made the white underneath POP!


I used the Chomas Creations adjustable pen holder for the Silhouette Cameo with a Sakura glaze pen in black to draw the subway title that I downloaded from Studio called phrase goofy.  I love how the glaze pen looks kind of like it is raised after it is drawn.  I added a shadow to the title, and then without removing the mat from the Cameo, I took out the pen holder, added the blade and cut the shadow.


I also used one of my journaling circles made with the Chomas Creations adjustable pen holder. You can get the file and tutorial for these here... journaling circles


Here is the completed page with some of  my favorite goofballs!


Like what you see? Leave a comment to let me know!

Wednesday, February 29, 2012

St. Patty's Day card with the Chomas Creations adjustable marker holder

Ready for a leap year sale???  Use the coupon code leapyear15 at checkout to save 15% off your purchase of $35 or more on the Chomas Creations store!

Yipppeee!  Maria from Believe Dream Create is back with another awesome project for you to check out!  Stop on by Maria's blog and leave her a comment, she has some awesome projects she has been up to & she always has the best tutorials.
It's Maria with another project for you using the Chomas Creations Adjustable Holders for the Cricut. I thought I'd use one of my favorite pens in the whole world. I have been using these pens since way back in High School. As a matter of fact, there was a time when I would ONLY write with them. Now with the endless colors they come in and the Chomas Creations Adjustable Pen Holders--YAY!!!!


I used the Kelly Green color and the Word Collage Cartridge. This was so easy I'm embarrassed! Just goes to show you how a little pen holder can make all the difference in the world!


I colored some of the words in with a Gelly Roll Stardust pen. The silhouette is from A Child's Year. I hand cut the borders around it because I wanted it to have more of a handcrafted feel. The Shamrocks are a Martha Stewart punch with a little Stickles.

I had so much fun with this! Thanks Amy!

Maria you are so welcome!  Thank you for what you do! 

Like what you see? Leave a comment to let me know!

Saturday, February 25, 2012

Thanks a bunch cards by Kelly


Oooh just wait till you see the card set that Kelly of Finding Time to Create has made with the Chomas Creations adjustable pen holder for the Silhouette Cameo! 
I just love how she always adds a little box to hold her cards!!!  I know she has the share on her blog for the box that she made!!  Stop on by and tell her how cute her cards turned out, and while you are there, check out the awesome tutorials she is always doing for the Silhouette Cameo!

Like what you see? Leave a comment to let me know!

Friday, February 24, 2012

1st grade layout with Chomas Creations adjustable pen holder

One of the looks I have always liked in a scrapbook page is the journaling going across the page.  But I, like so many others, don't have a 12x12 printer to get this look!  Fear not oh friends of mine that read this blog, I have an easy solution!  I used the Chomas Creations adjustable pen holder for the Silhouette/Cameo with the black metallic mini gel pen to get this look!  And using Studio is easy as you can type your journaling into the program!  Here is what my journaling looks like in Studio...


And here it is across the bottom of my page!  Just like a 12x12 printer!  The font is one I had made with my daughter's handwriting!  If you would like the font, I have it for download here...  Ella font
 I love the look of the black metallic mini gel pen on kraft cardstock as it kinda reminds me of pencil! 
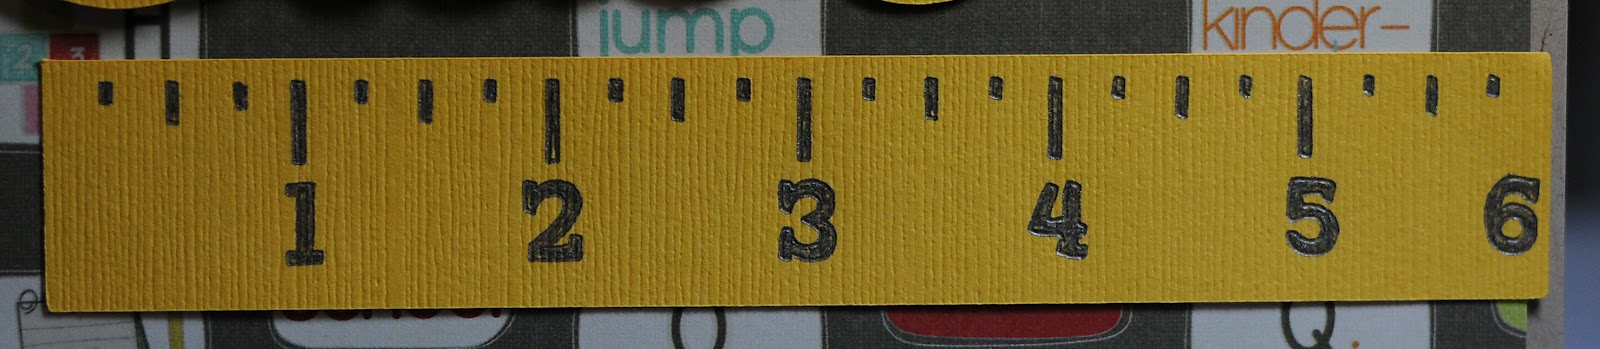
I also used the Chomas Creations adjustable pen holder and black metallic mini gel pen to draw the lines for the ruler.  This was a download for Studio called ruler.  I used the gel pen when I was done to color in the numbers and lines so they didn't look outlined.
The title was also a download from Studio store called first grade.
Here is the completed layout with my little first grader!  The papers I used are Imaginesce, as well as the ribbon. 


Like what you see? Leave a comment to let me know!

Thursday, February 23, 2012

Fly card with Maria and the Chomas Creations adjustable marker holder

Oh wow!  Wait till you see what Maria of Believe Dream Create has in store for you today!  Look at this fantastic card she has done & you will just love her tutorials!  You can stop by her blog and leave a comment for her!

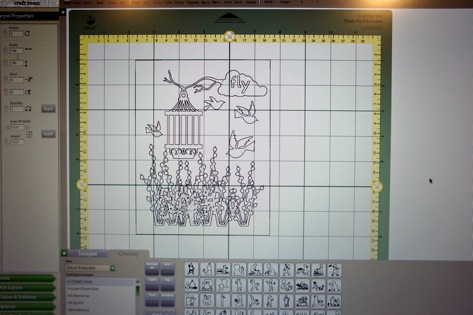
It's Maria again with the project I promised you using the Chomas Creations Adjustable Holder's for the Cricut. One of the things I love to do with my Cricut is to challenge myself to make a project based on only images on one cartridge by welding them together. I do this when I need to get some fresh energy going. Usually I do this on my Gypsy, but this time I used Cricut Craft Room and let me tell you--WOW! The Chomas Adjustable Holders and Cricut Craft Room a winning combination!!!!


I used the Serenade cartridge for the entire project. I welded all the branches at the bottom of the card--so perfect to use with the Pen Holders. All drawn at one time. Super Fast! Here is the holder and the pen I used--the white Signo Uniball.


I really don't need to tell you anything else except that you need these in your collection. This would be a perfect cover for a mini book or journal. As a matter of fact I think I'm going to make another one for a journal.....or a background in my Art Journal or.....you get the picture!

Thanks Amy for letting me try these holders--I just LOVE them. I have a few more projects up my sleeve that you will see soon......


Amy again!  Thanks soooo much for sharing Maria!  Love it!  Maria will be back next week with another awesome project and amazing tutorial!

Like what you see? Leave a comment to let me know!

Wednesday, February 22, 2012

Review of the Chomas Creations adjustable pen & marker holder for the Cricut

I'm so excited for my friend Maria of Believe Dream Create with Maria to do a few things with the Chomas Creations adjustable pen and adjustable marker holders for the Cricut!  She always has these awesome ideas, and she is just so creative!  I'm so glad I got to meet her at CHA a couple of years ago, as she was one of my very first customers!  So here is a review in Maria's words.  Stop on by her blog and leave her a comment if you would like.  She will be back tomorrow with a project!

Hi this is Maria. I was really excited when Amy asked me to make some projects with the new Chomas Creations Adjustable Pen Holder's for the Cricut. I have been playing with Chomas Creations products from the very beginning and have always been a BIG fan! But....let me tell you, the day I tried these new holders I  had an excitement with my Cricut that I haven't had since when the Cricut debuted.

Today I thought I'd do a review of what I tried and tomorrow I'll show you the first project I made.

Here's a look at the two Adjustable Holders. They come with very good instructions for you to get started. I found the little popsicle stick absolutely necessary and a wonderful idea to get the pen positioned correctly. Don't throw it away.

I used Cricut Craft Room with my E2. I think the most exciting thing about these holders is that the possibilities are endless in your choice of pens between the two holders. The E2 has no height limits like the Expression so your choices are ENDLESS! I used the free basic Cricut Craft Room cartridge and just made a grouping of circles in a 6" x 6" section. I copied and pasted this into each of the 4 quadrants on the mat so that I could get a true test.

Here's a look at the first pen after I put it in the holder. The popsicle stick helps you get the point of the pen in the exact correct position for the machine. This is a look with the pen in full motion.


I tried 4 different pens on the first page. A colored pencil, Gelly Roll pen, Pitt Pen and a Micron. I had unbelievable results with all 4!

I was so excited about this that I decided to try 2 more types of pens. My favorite white pen--Signo Uniball and a regular old Papermate pen that was on my desk (isn't it pretty? my daughter decorates them with Duct Tape).


Again, perfect results!
I have to tell you, I actually gave myself a headache after I did this. I had SO many ideas buzzing in my head at one time! I am a huge collector of pens and pencils from my "artsy" side. This could be the product that brings my two worlds together!

I fell in love with the Signo Uniball and the black paper.....I think you might want to go order yourself a set now because when you see what I made (which I'll be showing you tomorrow) you will want them in your hands ASAP to play! See you then!

Amy here again!  Thanks soooo much Maria!  Can't wait to see what you have in store for us tomorrow!

Like what you see? Leave a comment to let me know!

Saturday, February 18, 2012

Scoring with the Chomas Creations embossing/scoring tip

Well now, for those of you that know me, you know how I like things that make my life easier, and for those getting to know me, now you know! hehe! So if I can cut and fold a card in just minutes, and have a bunch ready to go and grab when I need them, I'm all for it! You will be amazed at how easy this is to do! You can download the file for Design Studio to make these 2 cards here... 4x6 card share
I also have a video you can watch on scoring with the Chomas Creations embossing/scoring tip.
Now to recap, this is using just the Cricut mat and a piece of cardstock, and the Chomas Creations embossing/scoring tip to score the card.
I added a big rectangle in Design Studio on the emboss layer, with some of the edges off of the paper (you don't need this part of the rectangle) to emboss with the Chomas Creations embossing/scoring tip.
Using a multi-cut of 2, emboss or score the paper with the Cricut.
Without removing the mat from the machine, remove the Chomas Creations embossing/scoring tip and add the blade. Swith over to the blade. Click the cut layer tab in Design Studio and cut out the card rectangles.
Now you can remove the mat from the machine, and take your cards off your mat, fold them in half and use a bone folder to smooth the edge. SUPER EASY! I did all 6 of these cards in less them 10 minutes!


Like what you see? Leave a comment to let me know!

Thursday, February 16, 2012

Welcome little one with Chomas Creations embossing kit

Lucky me, just over 2 weeks ago I got a new nephew!  This is Drew!  Of course I can't resist a cute boy layout, or cute baby Drew!  I actually used this welcome little one file before to make a page for my boy, and I was looking through old files and wanted to use it again!  You can get the file and see the other page here... welcome little one
I used the Chomas Creations embossing/scoring kit to emboss the little circles on the vellum as my background.  I did use a multi-cut of 2 to get them to really stand out. 

I used the Chomas Creations mini gel pen holder with a glitter silver mini gel pen to draw the title, then without removing my mat from the Cricut machine, I took out the mini gel pen holder, replaced the blade, and cut the shadow around the shapes.

I also used the Chomas Creations  mini gel pen holder to draw the journaling circles.  You can get a tutorial and the download for the design here... journaling circles

I added my super cute pictures of Drew, some ribbon and buttons to the page to finish it.

And did I mention that you can get the Chomas Creations mini gel pen holder and embossing kit at lower prices in the Chomas Creations store? 
And that I now have a way to sign up to email alerts to you when ever I post something new on this blog?  It is on the right----->
Like what you see? Leave a comment to let me know!

Wednesday, February 15, 2012

Detroit Tigers with Chomas Creations embossing kit

One of my favorite things to do in the summer is to head to a Detroit Tiger's baseball game!  This year was tons of fun as it was an earlier game and we got to celebrate after in Detroit, and even headed to dinner downtown. 

I used SCAL (Sure Cuts A Lot) for this layout.  You can download images from the internet and then trace them in SCAL.   As you can see from the image, I added a dashed border around the outside, a feature I just love in SCAL.  I then used the Chomas Creations embossing kit and the Ten Seconds Studios metal sheets (colored side down) to emboss the images.  After they were done, I sanded the raised side to make the images pop, reminds me of the old fashioned signs!


For the background paper for this page, I downloaded a fence image, then used the Chomas Creations mini gel pen holder with the black metallic mini gel pen on kraft cardstock.  You can download the fence image here... fence image
I did the journaling on one of my journaling circles I have tons of, then added to the metal sheet and just cut around it...
You know how sometimes someone hops into your pictures, and you really just don't want them there?  Well that explains the clever placing of buttons on my photo! 


A heads up that by clicking the shop button at the top of my blog, you will be brought to my online store.  While it doesn't look pretty yet, it does work, and I can now take credit cards, as well as paypal.  Prettiness to come later, as soon as I get this zen cart thing figured out, UGH!


Like what you see? Leave a comment to let me know!

The Chomas Creations store now has lower prices!!

Stop by the Chomas Creations store to see the lower prices!!  We are getting our holders for less, so we are passing the savings on to you! 

I also picked a winner for the Love my Cameo blog hop!  Lois, you didn't leave me any contact information, so I'm posting this here and hoping you see it!  If I don't hear from you by 2-21 I will have to pick a different winner.

BloggerLois said...

I want to start using pens to journal for my scrapbook pages. Haven't tried that yet but it seems I could make unique tags and have the writing lined up nicely.


I've also added a spot on the right of my blog to subscribe by email to receive an update each time I post on here.  So if you love the ideas I come up with and want to be alerted, sign on up!


Like what you see? Leave a comment to let me know!